Manage Tax Regions in Liqnic Admin
In this guide, you’ll learn what tax regions are and how to manage them.
What is a Tax Region?
A Tax Region represents a geographical area where you must apply specific tax rates.
For example, if you operate in the United States and Canada, you might have different tax rates for each country, and even for different states or provinces within each country.
You can create a tax region for each country and set up sublevel tax regions for each state or province.
Each tax region has its own tax rate, and you can override the default tax rate for specific products or product types.
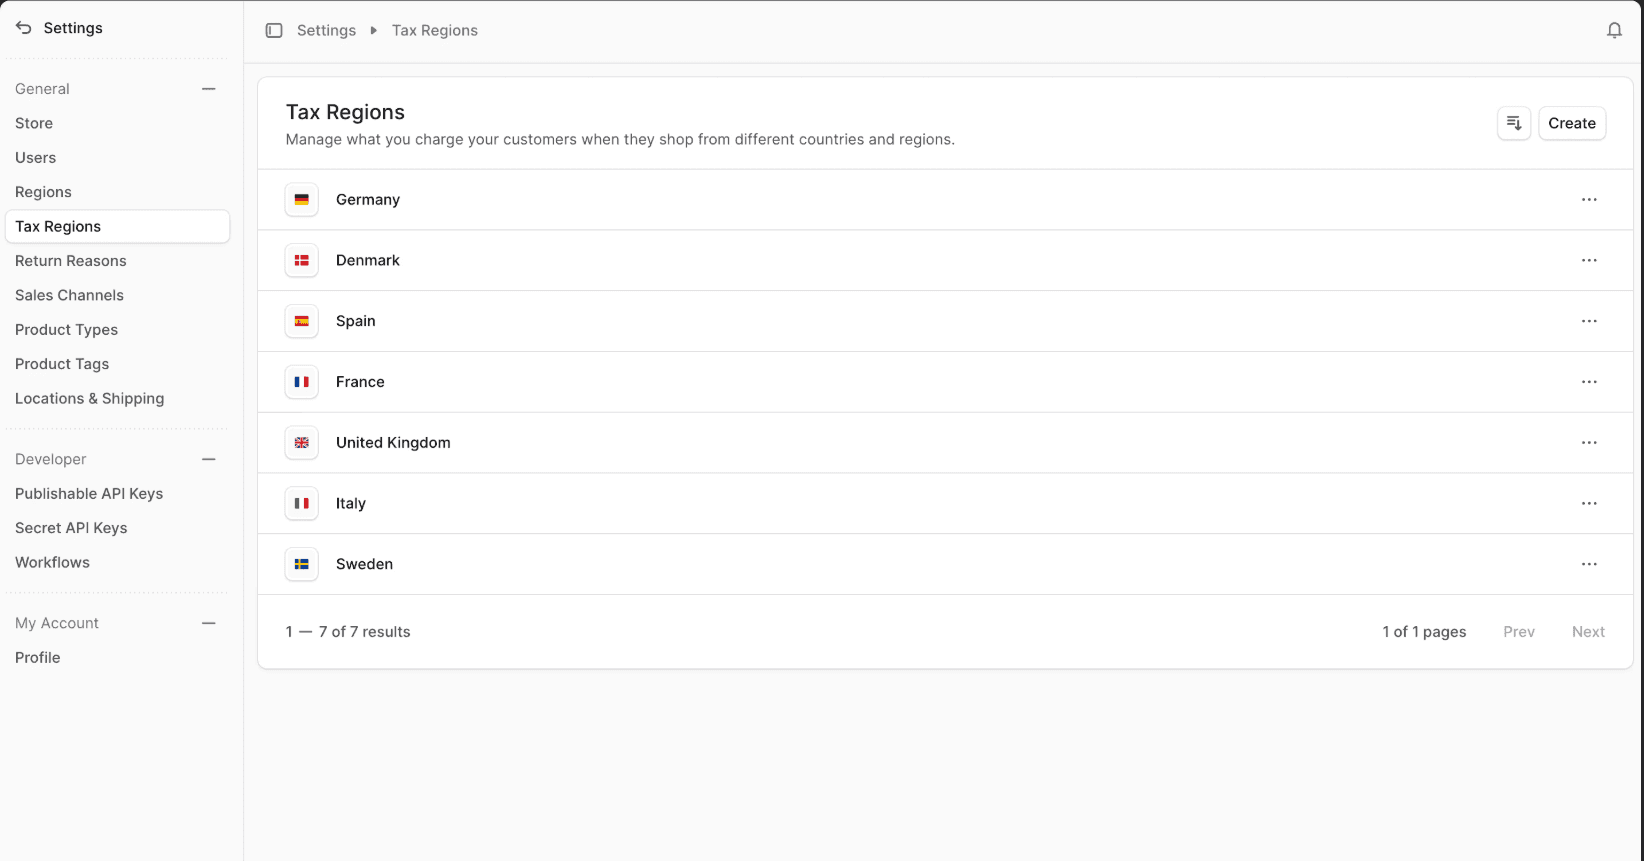
View Tax Regions
To view tax regions:
- Go to Settings → Tax Regions.
- You’ll see a list of all tax regions in your store.
- Use search, filter, and sort to find a specific region.
Create Tax Region
To create a tax region:
-
Go to Settings → Tax Regions.
-
Click the Create button.
-
Fill out the form:
- Country: Select the country this tax region applies to.
- Default tax rate: Optionally enter a name, rate, and tax code.
-
Click Save when done.

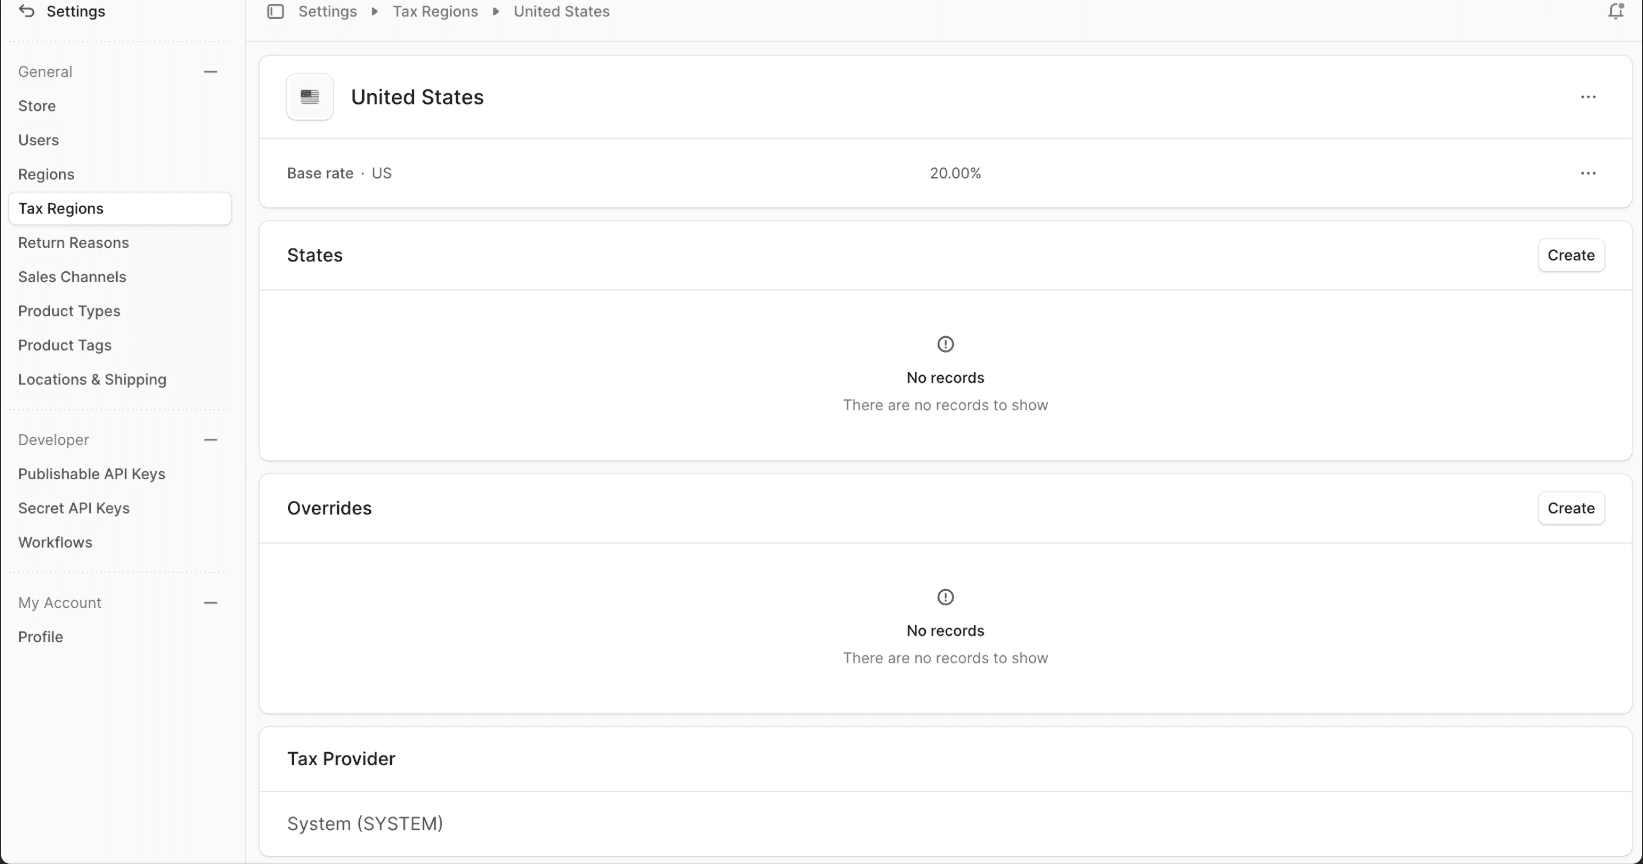
View Tax Region Details
To view a tax region’s details:
- Go to Settings → Tax Regions.
- Click on a tax region from the list.
This opens the Tax Region Details page.
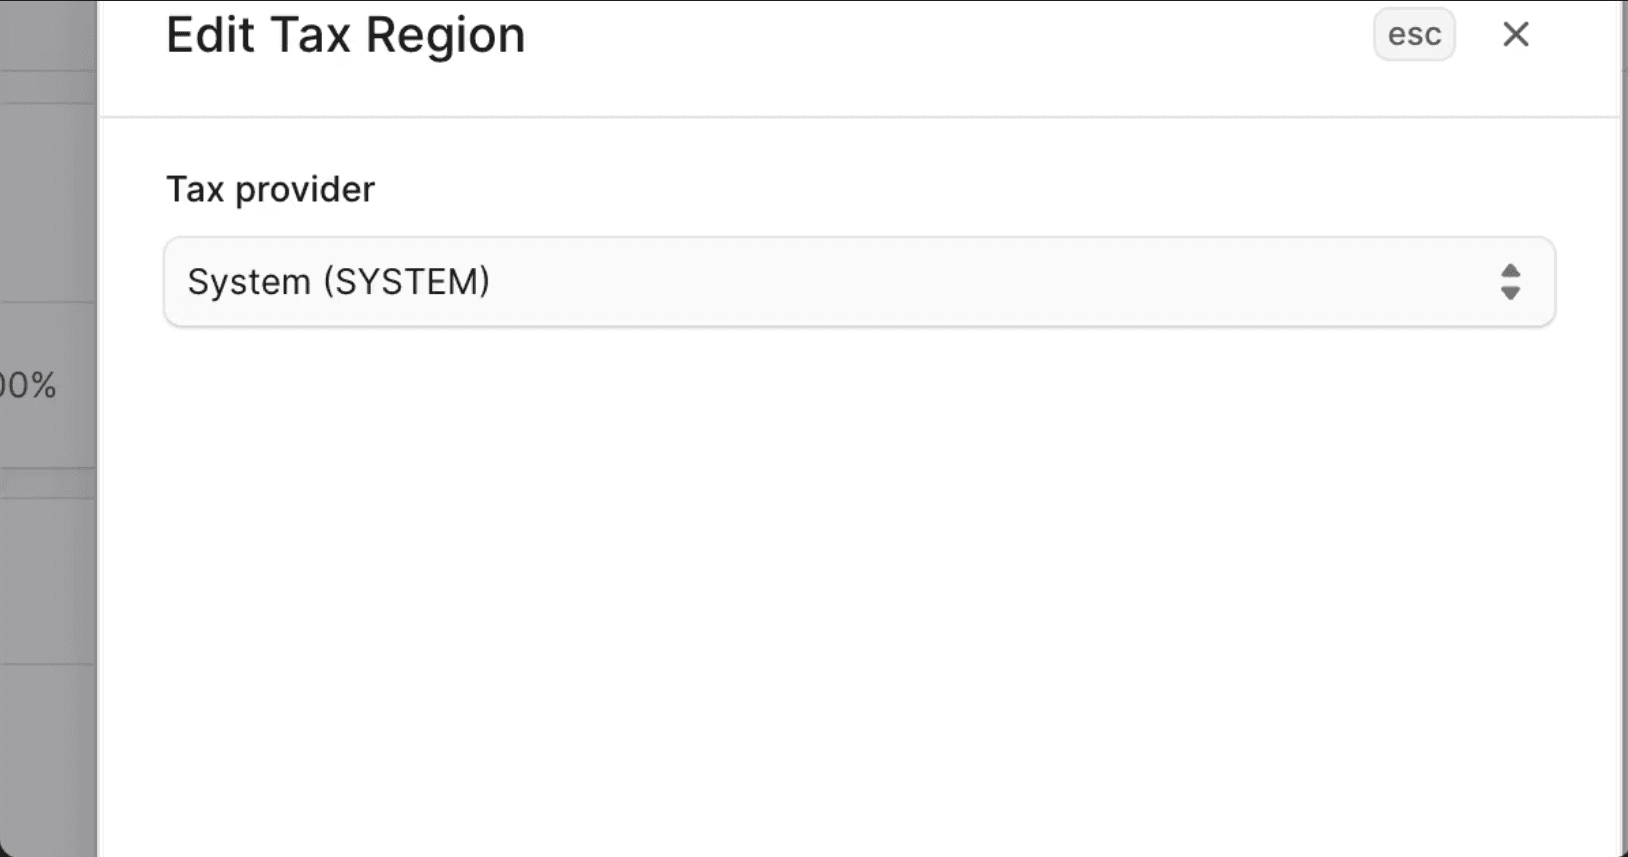
Edit Tax Region
To edit a tax region:
- Go to the tax region’s details page.
- Click the ⋮ icon at the end of the tax region row.
- Choose Edit.
- Edit the default tax provider or other settings.
- Click Save when done.
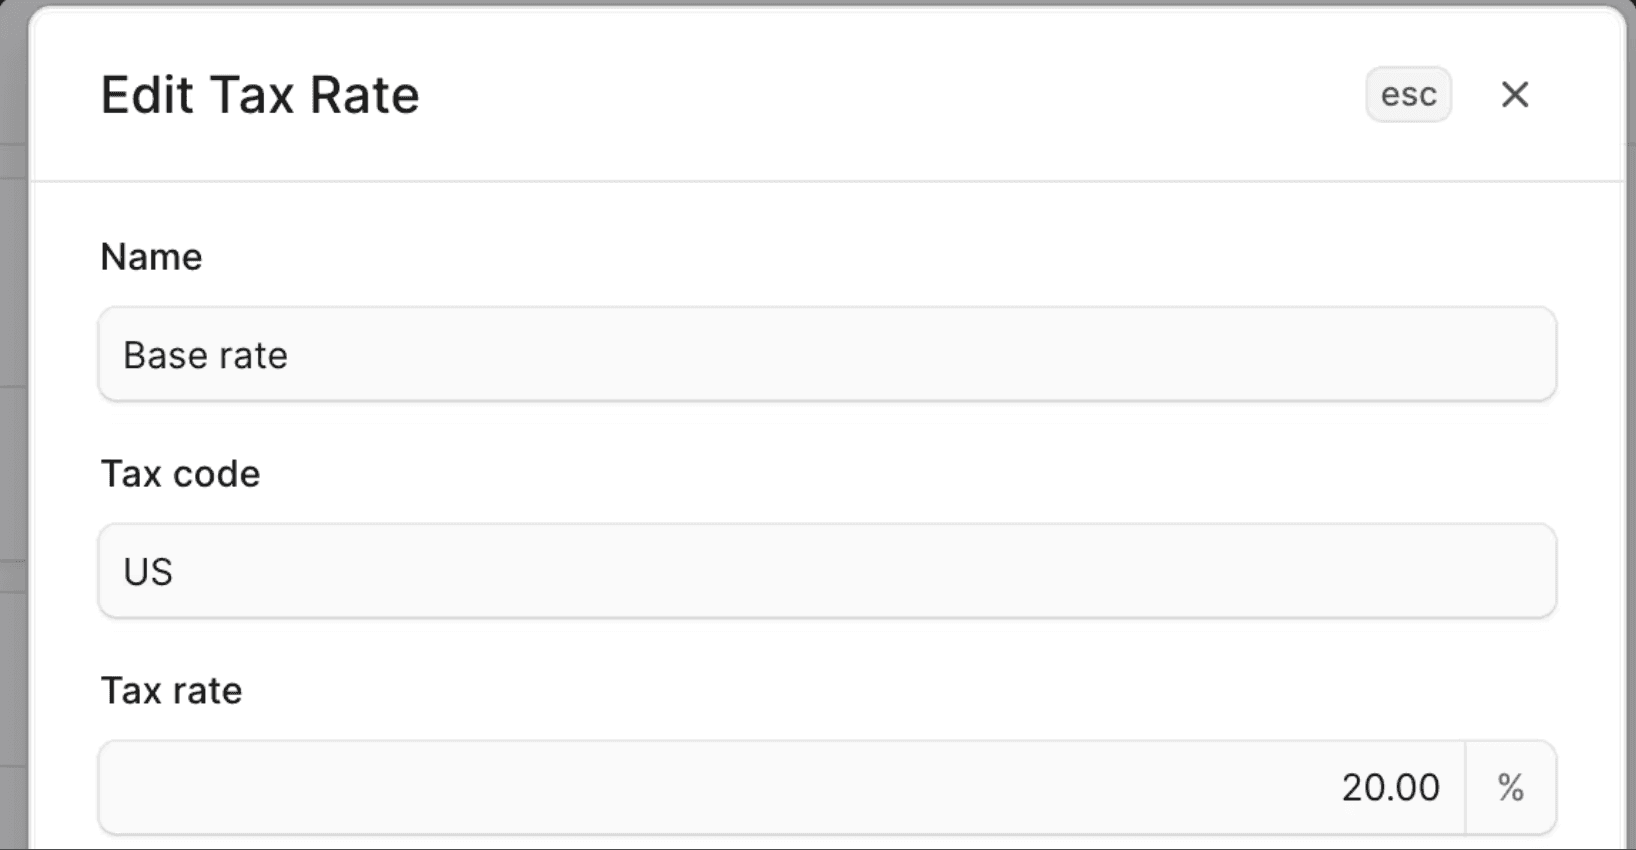
Edit Default Tax Rate
To edit the default tax rate:
- Go to the tax region’s details page.
- In the first section, click the ⋮ icon next to the default tax rate.
- Choose Edit.
- Edit the rate’s name, code, and tax rate.
- Click Save when done.
Manage Tax Rate Overrides
You can override the default tax rate for specific products, product types, or shipping options.
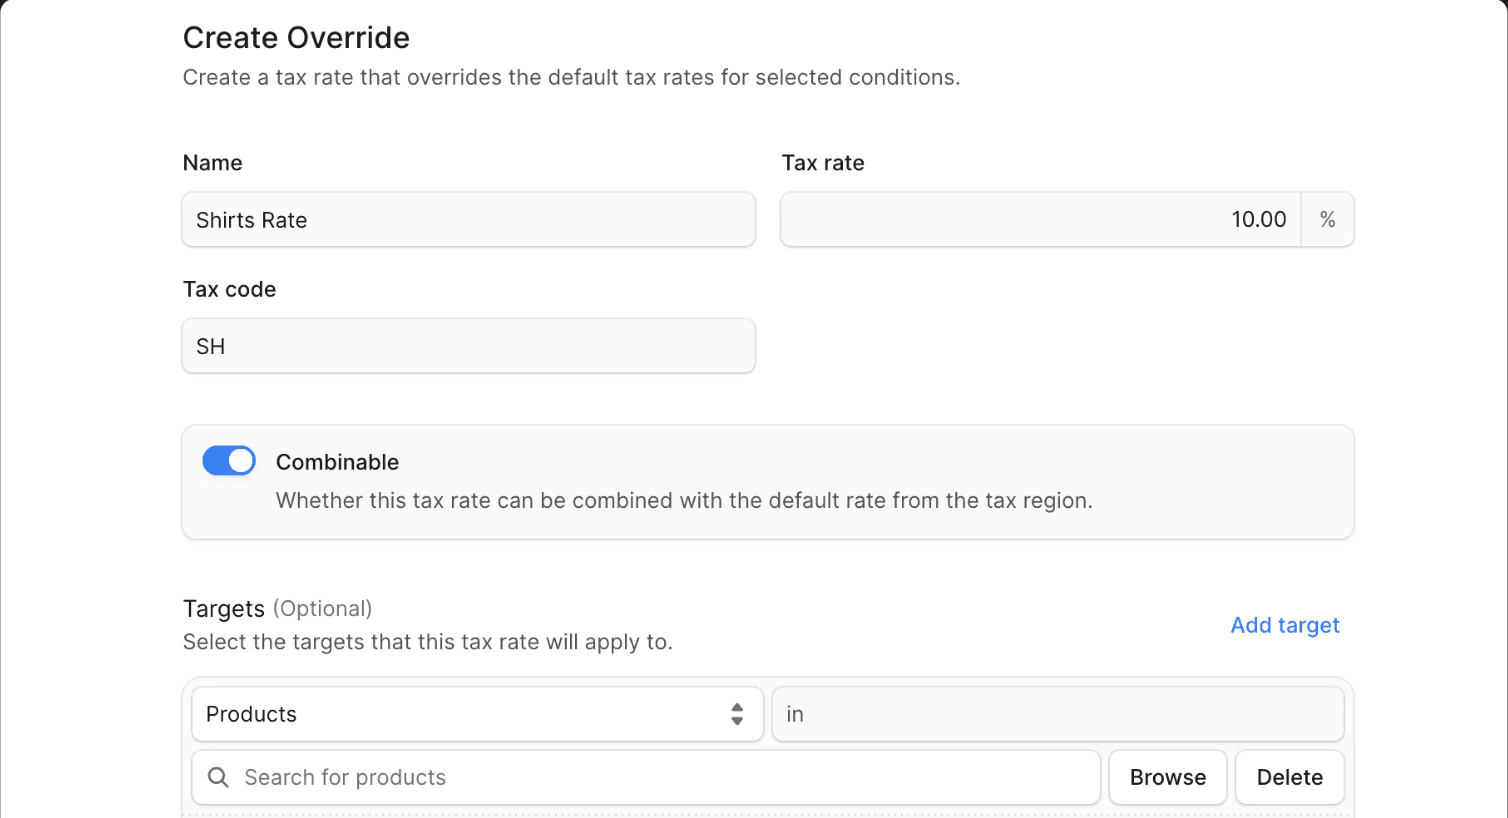
Create Tax Rate Override
-
Go to the region’s details page.
-
In the Overrides section, click Create.
-
Fill out the form:
- Name, rate, and code.
- Enable Combinable if it should combine with the default tax rate.
- Under Targets, add the products, product types, or shipping options to apply the override.
-
Click Save when done.
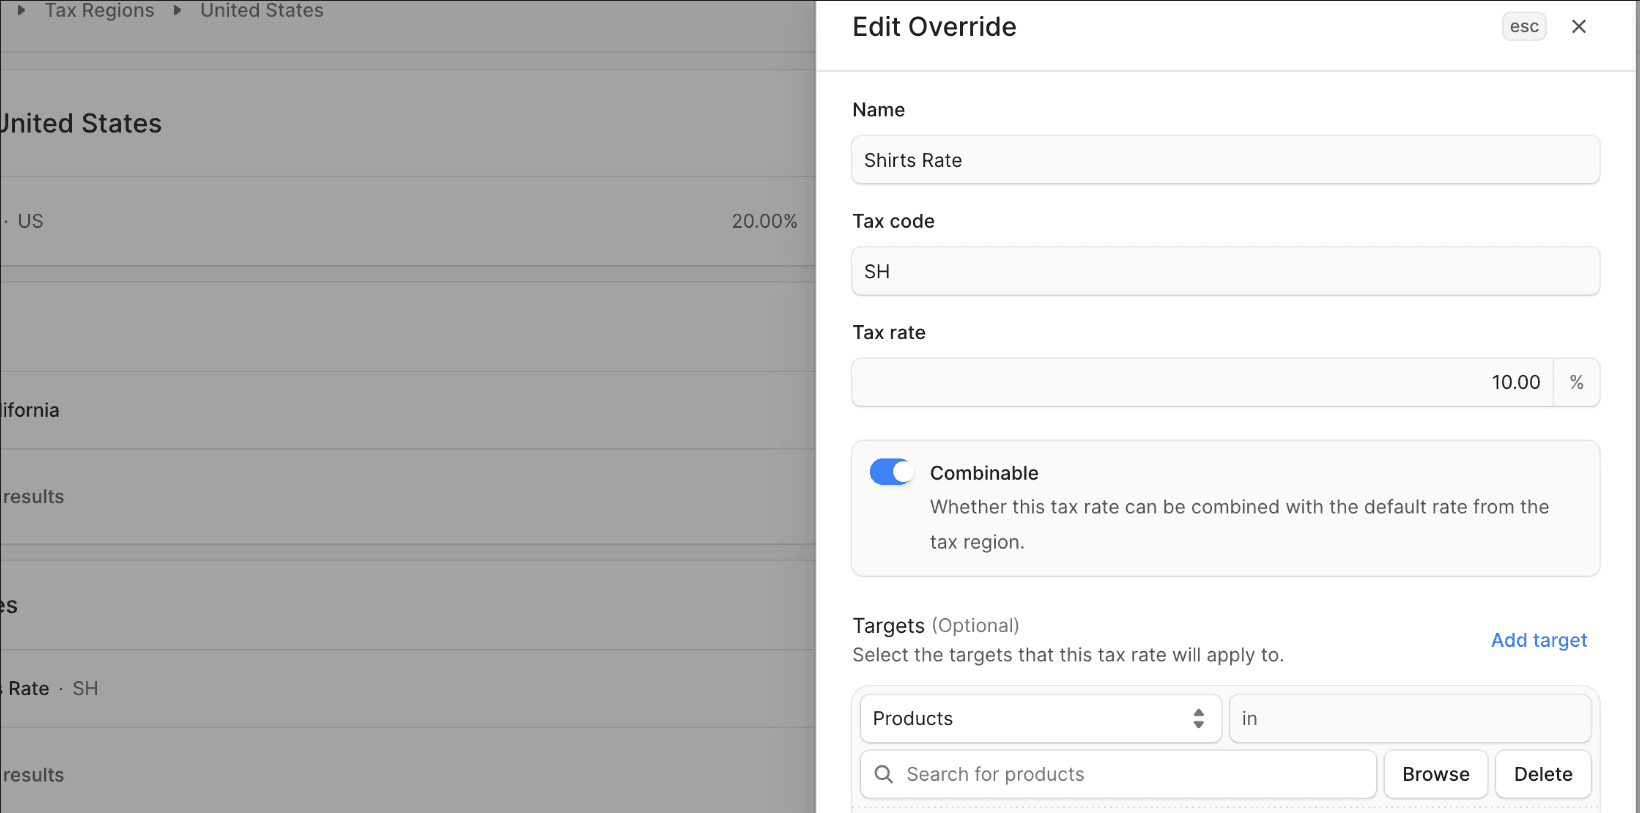
Edit Tax Rate Override
- Go to the region’s details page.
- In Overrides, click the ⋮ icon next to the override.
- Choose Edit.
- Edit the name, rate, code, combinable toggle, and targets.
- Click Save.
Delete Tax Rate Override
Warning: Deleting a tax rate override is irreversible.
- Go to the region’s details page.
- In Overrides, click the ⋮ icon next to the override.
- Choose Delete.
- Confirm by clicking Delete in the pop-up.
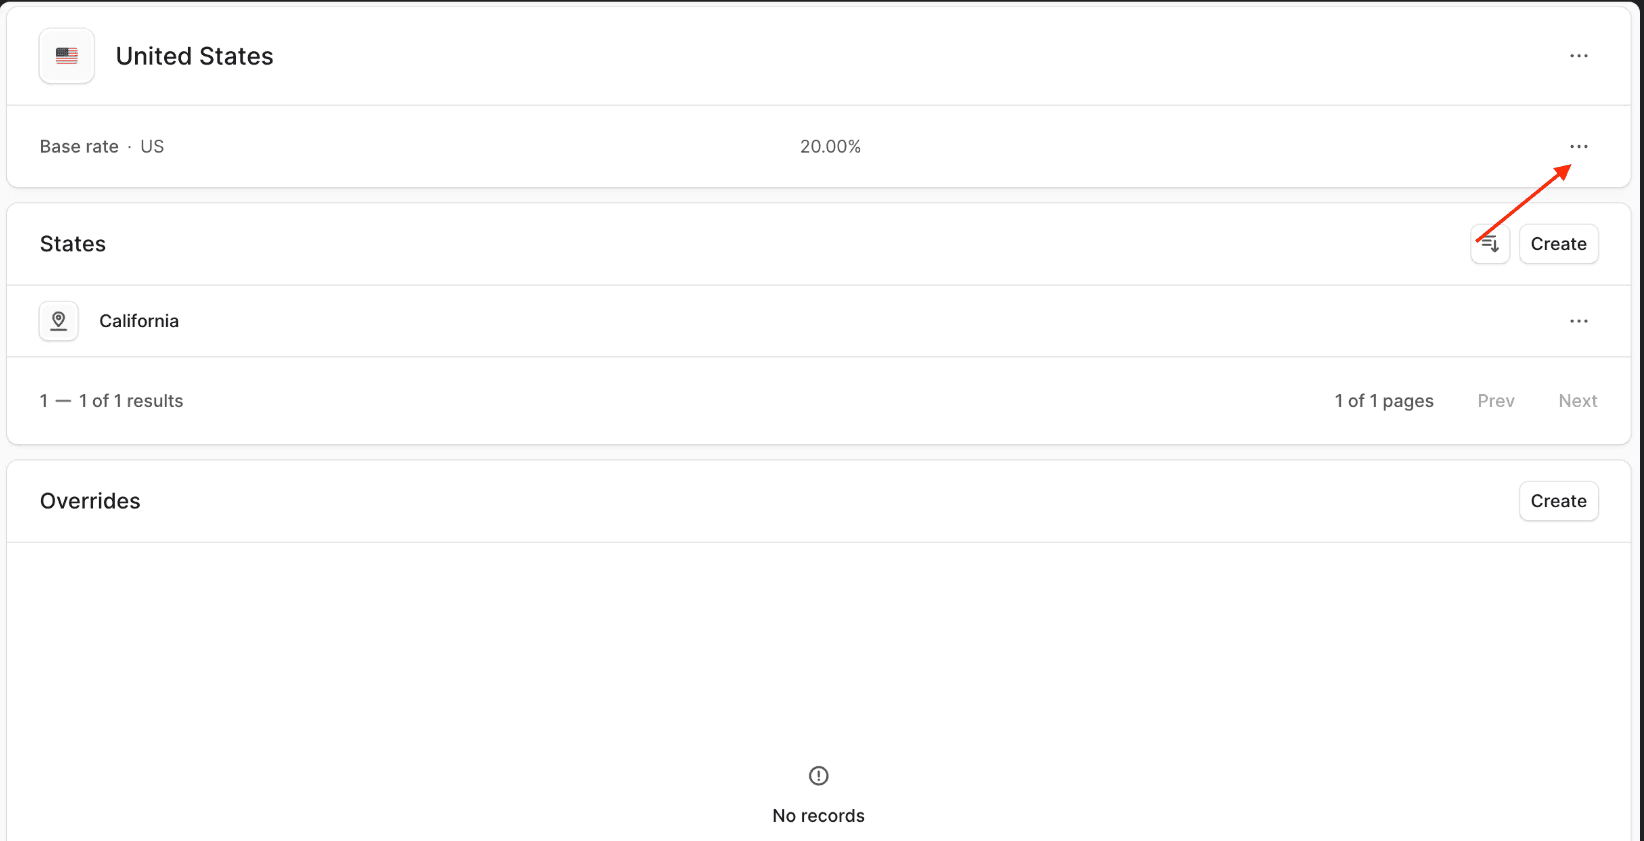
Sublevel Tax Regions
Some countries, like the United States, have a States, Province, or Cantons section in the tax region details.
You can add sublevel regions for countries and enable sublevels for other countries from the top of the page.
Create Sublevel Tax Region
-
Go to the tax region’s details page.
-
In Sublevels, click Create.
-
Fill out the form:
- Select state/province/canton if supported, or enter ISO 3166-2 code.
- Optional default tax rate name, code, and rate.
- Enable Combinable to combine rates with the parent.
-
Click Save.
View Sublevel Tax Region Details
- Go to the tax region’s details page.
- Under Sublevels, click a sublevel tax region.
This opens the sublevel region details page.
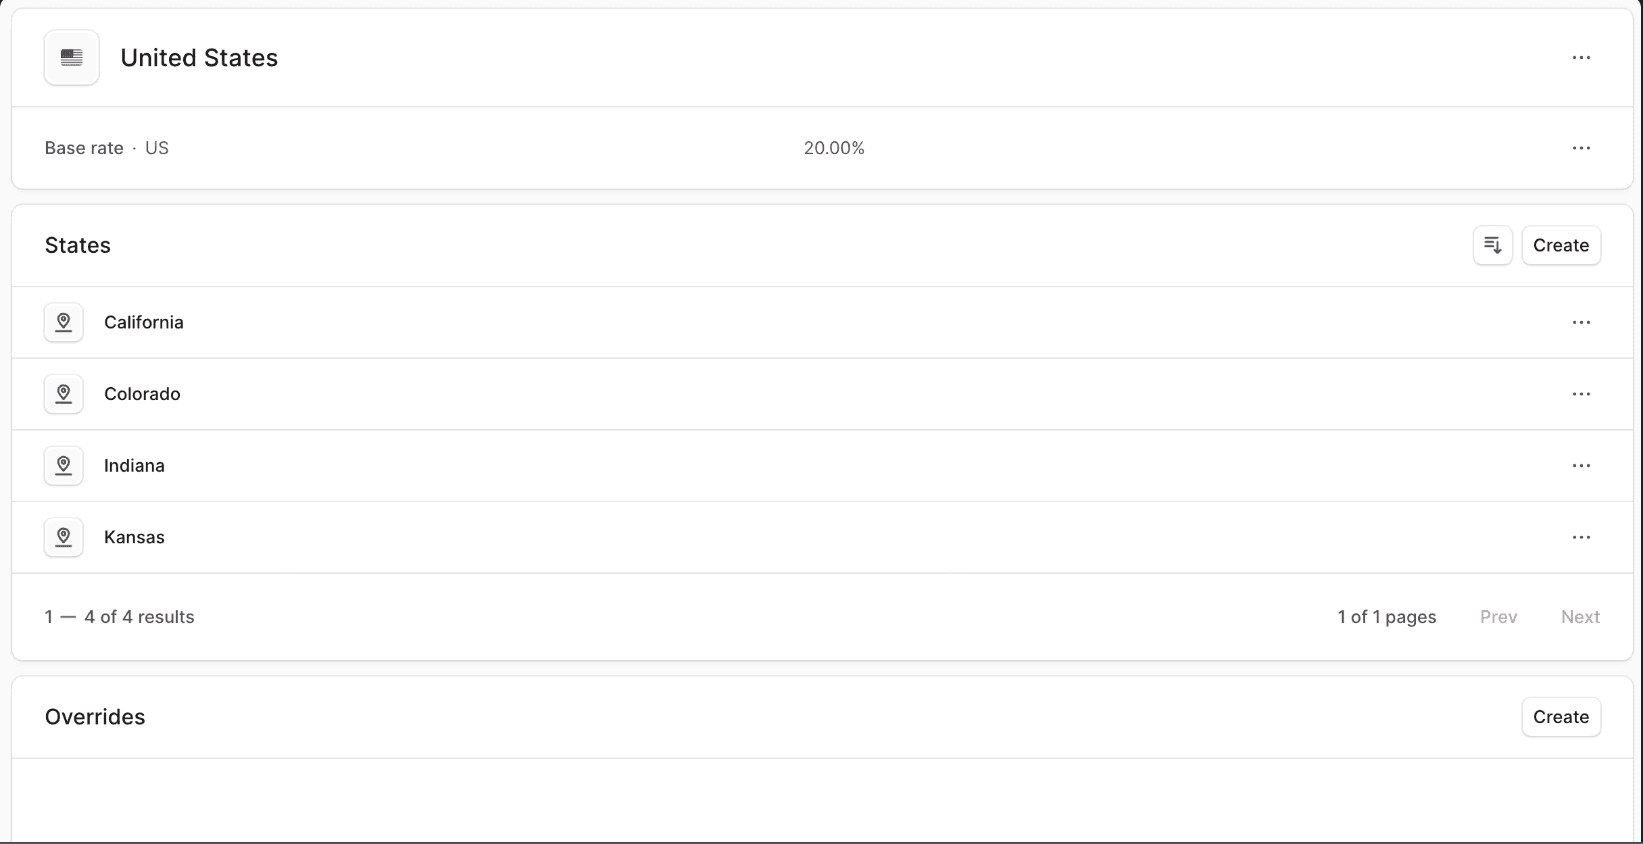
Manage Sublevel Tax Region’s Rates
Manage default and override rates the same way as the parent tax region.
Delete Sublevel Tax Region
Warning: Deleting a sublevel tax region is irreversible.
- Go to the sublevel tax region details page.
- Click the ⋮ icon in the row.
- Choose Delete.
- Confirm by clicking Delete in the pop-up.
Delete Tax Region
Warning: Deleting a tax region is irreversible.
- Go to the tax region’s details page.
- Click the ⋮ icon in the row.
- Choose Delete.
- Confirm by clicking Delete in the pop-up.